Saturday, 21 November 2020

Less is More One Layer Challenge ...

Time for a new challenge at Less is More and this time it is everyone's favourite - One Layer Challenge!


I have two projects to inspire you today ... both are very CAS:


Both cards involved heat embossing of a sentiment to form the focal point.  On the first card the floral flourish was heat embossed and then water coloured with distress inks - I have no idea where the floral stamp came from as it has lurked for years in my stash.


On this card I again heat embossed the sentiment before stamping the holly with distress inks.  This stamp is another one that I've no idea where it came from as it has lurked in my craft stash.

I used:
CAS-UAL Friday - Snowy Sayings
Distress inks - Pine Needles, Festive Berries and Picked Raspberry
WOW Metallic Gold Embossing Powder

Pop across to the blog and check out the rest of the design team projects.

Stay Safe!

Friday, 20 November 2020

STAMPlorations Giving Thanks ...

 Welcome to this year's STAMPlorations Giving Thanks Blog Hop and Giveaway :


There are prizes to be won and lots of giveaways ... as well as an opportunity to see some amazing projects from the design team.  So get yourself a coffee (or tea) pull up a chair and check it out.  I have created two cards:


Firstly I created a background card using my gelli plate, acrylic paints and stencils - you can see the detail in the close up photograph.  The beauty of using a variety of stencils is that you create a lot of texture on the gelli plate by adding layers of colour before picking up the print, I think it adds extra interest.  I die cut the leaves to create a negative space and adhered this panel using foam adhesive to add additional dimension.  I also die cut 'thanks' a number of times to give depth to the sentiment.


This card also uses card coloured on a gelli plate plus lots and lots of 'thanks'!

I used:

I hope you will join in with the blog hop and get lots of new ideas for your creating.

Stay safe

Poinsettia ...

Good afternoon from a wet and dreary Oxfordshire ... after my very long last post I thought I would treat you to a short and to the point post.  Surprise, surprise another couple of Christmas cards - two designs using the same UNIKO stamp sets.

First ... an off the edge water coloured poinsettia:


I stamped the flower onto a die cut panel and fussy cut the edge having water coloured it first, I also trimmed the card base front.  The panel was adhered with foam tape to add dimension.

The second card could have been a one layer card if my inky finger had behaved and not put a smudge of black ink in the wrong place!


For this card I only stamped part of the poinsettia from the first card having fussy cut a mask.  I stamped through the negative space and then used the positive part of the mask to cover the flower before stamping the sentiments around it.  I coloured the flower using crayons.  At this point I had to cut the panel away from the card, trim it and adhered it to another card ... if my inky finger had not got in the way it would have been one layer!!

I used:
UNIKO Pure Florals: Poinsettia
            Festive Sentiments
Distress Inks - Festive Berries, Carved Pumpkin
Faber Castell Polychromo Crayons

I'm entering the following challenges:


Keep crafting!

Thursday, 19 November 2020

Begin again ... 2020 Garden Project

I have 'dabbled' with gardening over the years but never really been into growing vegetables although for years I have always grown my own tomatoes.  This year has been very different ... with the UK in total lockdown from March and having retired I just had to find something to help fill my days and get me out of the house.  So I turned to my garden ... not only would it shift my mental focus to something positive but I could also provide my family with fresh produce.  It has been hard work but so enjoyable and, much to my surprise, quite successful as well as very tasty!

First task was to remove the pond ... we decided that maintaining a large pond was not a priority so the liner was removed and the hole filled - it took days of carrying buckets of soil from elsewhere in the garden before it was full.  I was able to save some of the liner to create a small wildlife pond.


This was to be the site of a large raised bed ... while I was waiting for it to be delivered I used some wood lurking in my garage to build a small bed so that I could start growing stuff!


I'm not a natural when it comes to woodwork - it is not a thing of beauty but it works and I soon had salad growing!  I also planted runner beans in the flower bed; pumpkin and courgettes (some in amongst the flowers and two in very small raised beds also built by me); a spaghetti squash in another gap in the flower border; tomato plants in pots; an aubergine (eggplant) in a pot; and lots of herbs in pots.


The large raised bed eventually arrived in flat pack form!  I built it, positioned it and then filled it with a ton of soil!  Then all set to start planting ... so seeds at the ready in went carrots, radish, beetroot, fennel, celeriac, leeks, radicchio and spinach and the watering began!!


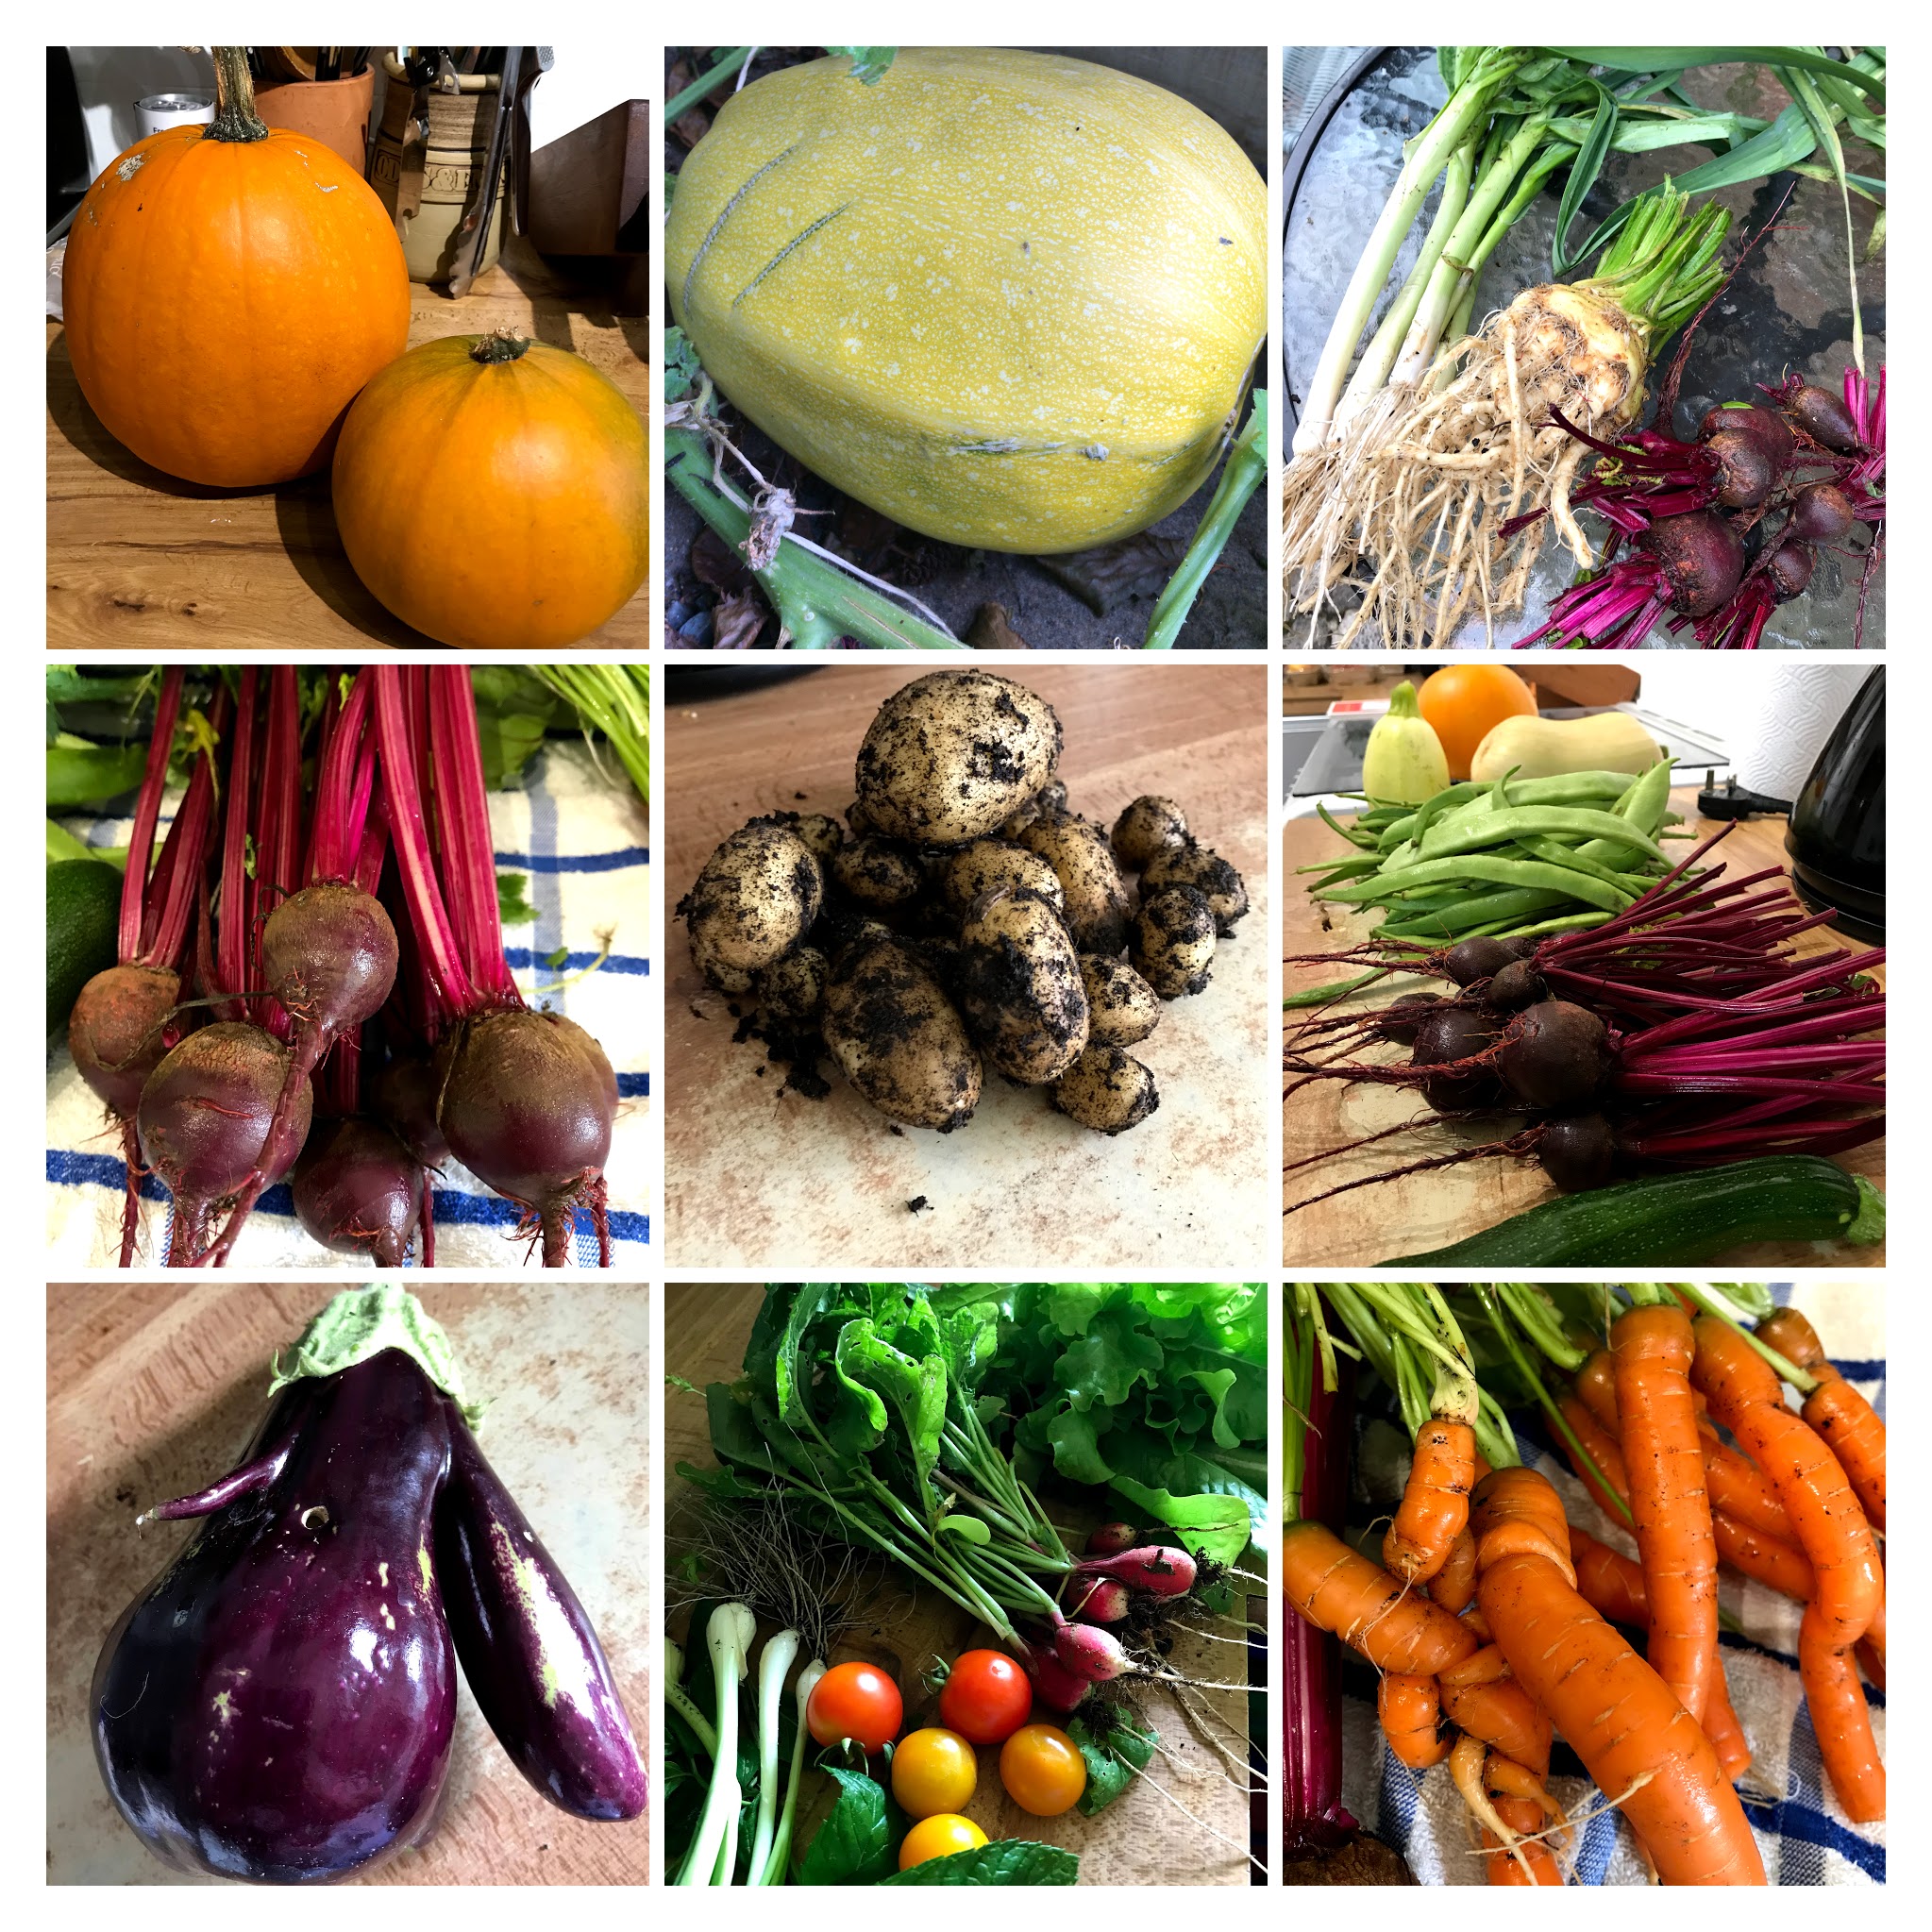
Was all of this effort worthwhile?  It is a resounding YES ... we have enjoyed a beautiful bounty of super fresh salad and vegetables (and still are).  I'm already planning for next year!  I'll finish this marathon post with just a few photographs of the 'fruits' of my labour:


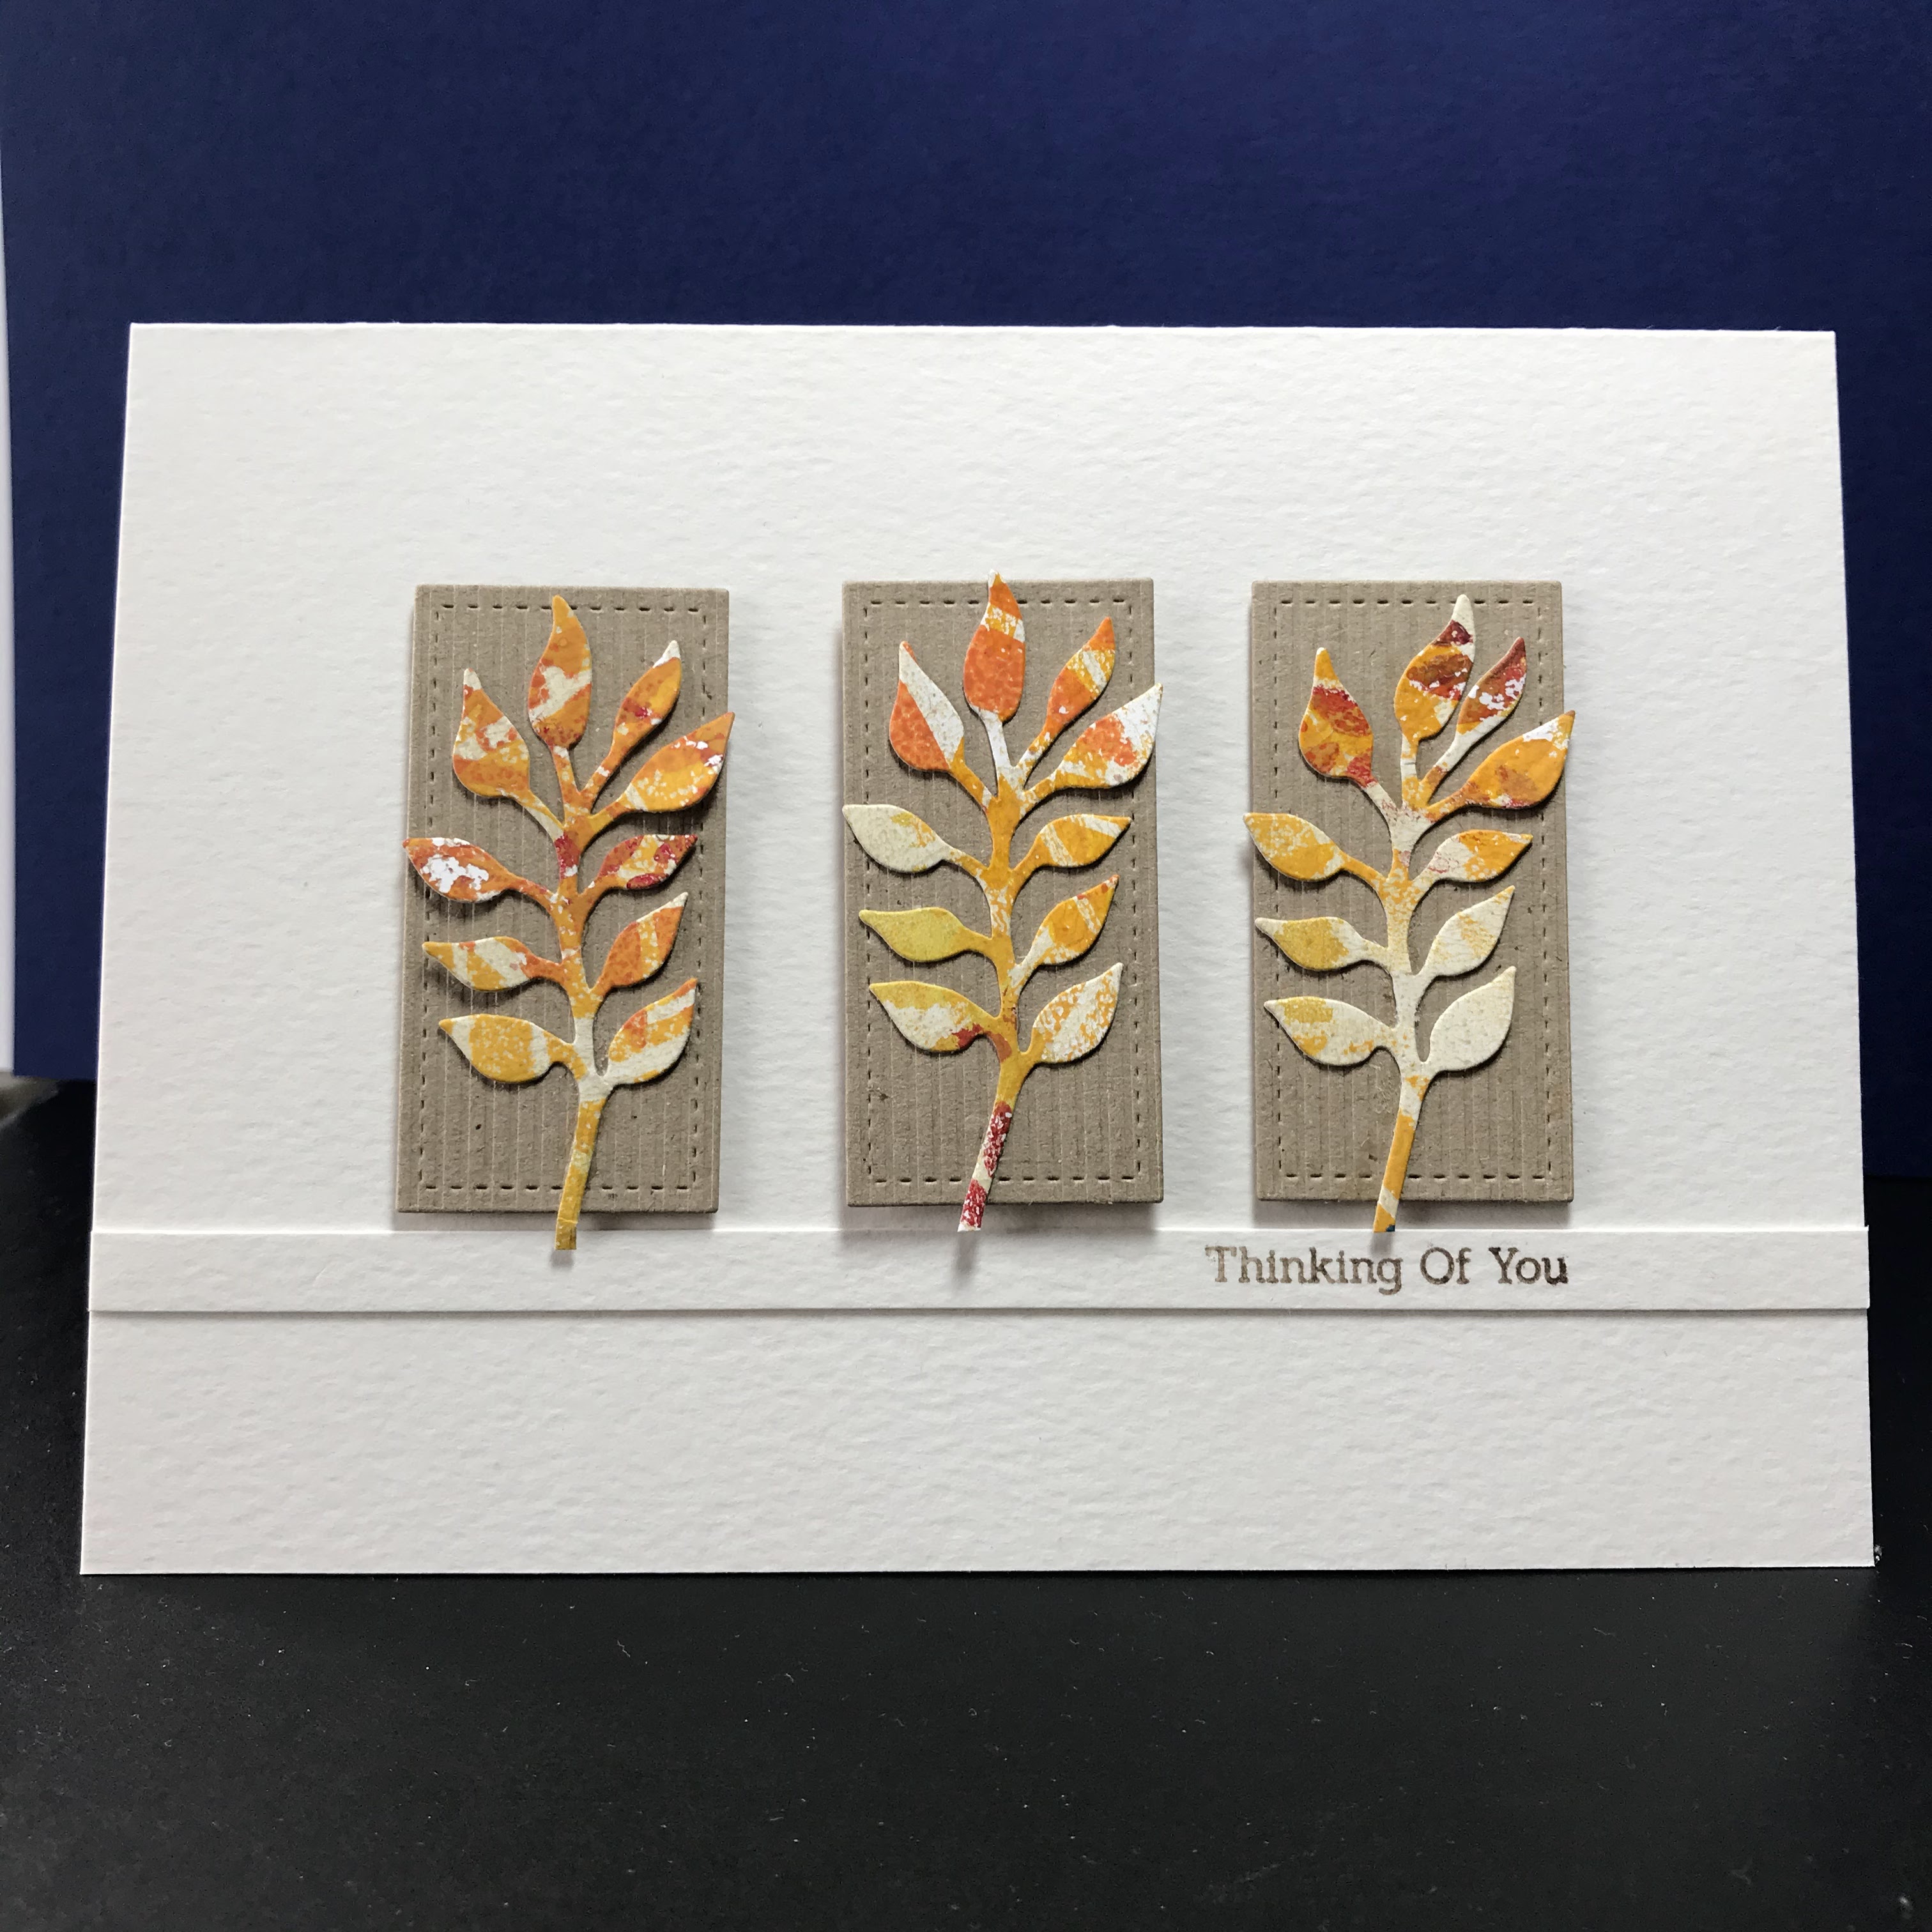
Thinking of you ...

 I'm popping by to share a quick card ... 


I was inspired by the new TIME OUT challenge:


I chose to create a card quickly ... I love to challenge myself to great cards without too much faffing, as quickly as possible.  This card came together like a dream ... I used two dies, one to cut the panels and one to cut the leaves using a piece of a left over gelli print and kraft card. Then adhered the panels to the card base with foam tape to add dimension and interest.  Finally, I stamped the sentiment - all was going smoothly until this point and I smudged the sentiment  and made a right mess!!  So I stamped the sentiment on to a slim piece of card and heat embossed it before adhering it to hide the mess.  It took about 10 minutes to create the card ... it would have been less if I hadn't messed up the sentiment!!  The speed was only possible as the dies and card were already resting on my desk!

Stay Safe!

Monday, 16 November 2020

Begin again ... 2020 Furniture Projects

In my quest to look at the positives of this year I thought I would begin with furniture projects. I enjoy updating and renewing furniture - in the past I have made new covers for sofas, reupholstered chairs and other small projects. This year I have completed a number of projects primarily for my daughter - taking battered pieces of furniture adding a lick of paint and some new fabric.

The first two projects were small storage stools:

I didn't think to take a before photograph!

The brass handles were covered in layers of paint which I managed to remove back to the brass

Next up (before the UK lockdown) I picked up a rather old tatty footstool from a charity shop, This was a big transformation for such a small piece of furniture as it required stripping completely and re-webbing!

This project was for me!

 Next up:


This very brown cupboard belonged to my parents and had been in my garage for over two years waiting for someone to need it!!  Finally it has a new home looking very different:

It now resides in the hall of my daughter's new house.


The final furniture project (with photographs) is a blanket box, as I stripped it back ready to start it became clear that I wasn't the first to recover the top!

The changes were quite dramatic -


I've also refurbished my dining room table  - removing all of the old varnish and then waxing it; stripped and painted the door and drawer fronts in my kitchen and redecorated the kitchen; and decorated the downstairs cloakroom!

On reflection I seem to have completed a few projects ... and that's not all!  I'll be back soon to tell you all about my gardening adventure!

Stay Safe.

Begin again ...

 It is almost a year since I retired and what a year it has been!   It would be fair to say that I didn't cope well with retirement to begin with and then add on top the current pandemic restrictions on life and I have not been in the best of places for much of the year.  So with the New Year looming I've decided I need to begin again ... 


I created this tag to act as a reminder to me!!!

I thought that to begin with I would reflect on the year and look at what I have been doing rather than what I haven't been able to do!  I hope to write a series of blog posts to share the projects that haven't featured on my blog so far ... to act as a record and a starting point for 2021.

Stay safe!

Although I created the tag as a reminder for myself I am going to enter in the current challenge at Country View Challenges - November 2020 - Anything but a Card.