Before I finish I want to say a big Thank you to all my followers, to all my visitors and to all that have left such supportive comments over the year - I appreciate each and every one of you. I wish you all the very best for the New Year and hope that it will not be long before we can hug family and friends or at least see them.
Thursday, 31 December 2020
Goodbye 2020 ...
Before I finish I want to say a big Thank you to all my followers, to all my visitors and to all that have left such supportive comments over the year - I appreciate each and every one of you. I wish you all the very best for the New Year and hope that it will not be long before we can hug family and friends or at least see them.
Tuesday, 15 December 2020
Stamplorations December Reminder ..
Just popping by to remind you all that you still have time to play in the December challenge at STAMPlorations:
I've taken the colours and shapes from the photograph and used shimmer paper for the sentiment.
I used:
Saturday, 5 December 2020
Guest Designer Christmas Card Throwdown ...
Wednesday, 2 December 2020
Snowmen ...
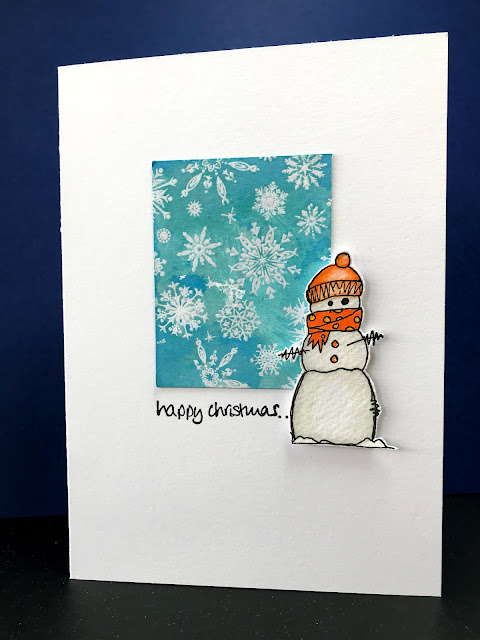
A simple design that I could use for multiple cards using different stamp sets and backgrounds. I first created the background using a stencil and distress inks to create a water colour effect, The Snowmen were all stamped and heat embossed before colouring with Zig Real Brush markers and then fussy cut to provide a focal point. The Snowmen were adhered to the card base with foam adhesive for added dimension.
Tuesday, 1 December 2020
STAMPlorations December challenge ...
Well done ... we've made it to December and it's time for the final challenge of the year over at STAMPlorations ...
I've taken shapes and colours from the image and added shimmer for the sentiment.
Saturday, 28 November 2020
Pink and Brown Tag ...
I stamped 5 outline circles which I masked before using a collection of small background stamps to add colour and interest to the vertical line - for a grungy effect. I die cut and stamped 'Christmas' and adhered the panel to the tag with foam pads to add a little dimension.
Wednesday, 25 November 2020
Christmas words ...
... actually two cards, one design, two colourways!! I'm not sure I like them - there is something not quite right about them but they were fun and easy to create.
Monday, 23 November 2020
Begin Again ... 2020 Textile Projects
The two pieces on the left I created on the course, top right I created on the child's vintage loom in the bottom right photograph. We enjoyed the day so much that my friend and I have invested in a small loom to share - so more projects will follow.
Along the edge ...
I've started the week with that Monday morning feeling ... I'm sure I should be doing something useful or important but instead I have been messing around with paper and card. Even this had me going round in circles ... I did mange to create a couple of cards:
Sunday, 22 November 2020
Begin Again ... 2020 COVID Projects
Quite an eclectic collection from hand embroidery, to machine applique and the final panel of boats is based around sashiko technique. The two squares with hands on were both lino printed.
Over 300 squares have been created and combined to make a number of quilt panels which are already being exhibited in the Museum in the Park, Stroud. I managed to visit before the current lockdown began, hopefully these photographs will give you an idea of the scale of the project:
Saturday, 21 November 2020
Begin again ... 2020 Quilts
The upside to having time on your hands free from work obligations - is time to complete some of those projects that have been on the go and 'almost' finished. Years ago, 2012 to be precise, I created the top of a quilt - it was the first time I had attempted a machine quilt. That was as far as I got until this year when I was determined to finish it and I did! I layered it up with wadding and a backing sheet and then machine quilted it - nothing fancy just stitching in the ditches, I found this quite a challenge on a domestic sewing machine as the quilt is large enough for a double bed.
This shows the work in progress - I started by edging each of the pieces before then stitching similar sized panels into long strips which in turn were then stitched together. I had to 'audition' the layout on the lounge floor as it was the only space big enough! Some of the cross stitch pieces were on two inches square! Once the top pieces had been stitched into one piece it was layered with wadding and more of the cream calico and then machine quilted.


